EDIT 04-30-2017
After a chat with the community, it seems that running 4 nodes at the same time on a RPI5 is not efficient on uploads peaks. That’s why I updated my setup to use a union filesystem and make storj-daemon see my 4 hard drives as only one. See the setup below…
What is Storj?
Since a couple of months, a project grabs all of my attention. That’s Storj.io.
If you never heard about it yet, Storj presents itself as a decentralized and encrypted cloud storage system based on blockchain technologies. The press, always optimistic, even names it the Airbnb of cloud storage.
What is it, really? Storj is a network built on top of the equally named protocol, which aims to share extra disk space of individuals all around the world in order to provide a cloud storage system, cheaper and more resilient than Amazon S3 or Google Cloud Storage.
Of course, in exchange of its extra disk space shared accross the Storj network, the user (farmer) earns a couple of bucks each month, depending on the amount of megabytes stored on its disks and the amount of data downloaded and uploaded during the same period.
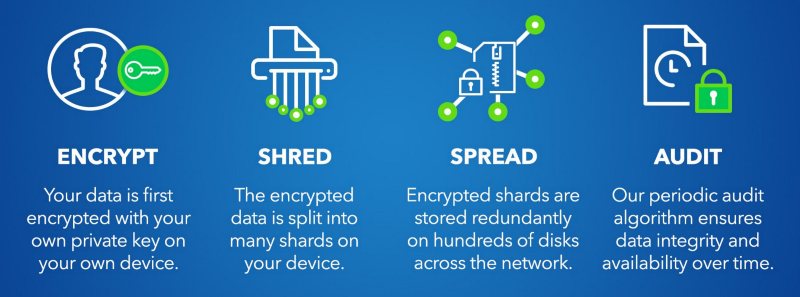
The vision of Storj is fascinating to me. The developers chose and implemented blockchain technologies at the very heart of the solution, which ease the de-centralization, allow faster data distribution, more resilient network, prevent security issues by encrypting everything and therefore, bring a lot of new features and opportunities to the end users.
Make use of extra disk space of individual could seem a bit surprising first but did you know that most of the personal computers hard drives are just partly used, leaving as much as one trillion gigabytes of space when the entirety of Google is estimated to be 10 to 15 billion gigabytes?! Did you know that a gigantic part of the data a French individual owns is actually stored and retrieved from Ireland (Amazon) or even from US? To store that amount of data, big companies like Google, Amazon, Facebook or Microsoft build massive datacenters absorbing gigawatts of power. And of course, when one of those fail, Internet goes down.
I think what Storj is building is quite similar to what is happening in power production and distribution. With the smart grid concept, we will progressively migrate from a centralized model, which cause around 10 percent of power production loss in transport in France, to a more efficient distributed model.
If you want to learn more about Storj vision, please read the Storj Master Plan. It’s a bit old but still seems quite accurate.
Build your own Storj node
Well, it’s now time to build your own Storj node to share your hard drive and earn a bit of money! In fact, it may be just the right time because StorjLabs company is bout to reveal a partership which should cause a big increase in storage demand!
So, what do you need to build your own Storj.io farming node? In fact, not much, just a computer with unused disk space. But if you want to build a cost efficient solution, always up and running, using something like a Raspberry PI may be a better idea than leaving your Macbook always turned on!
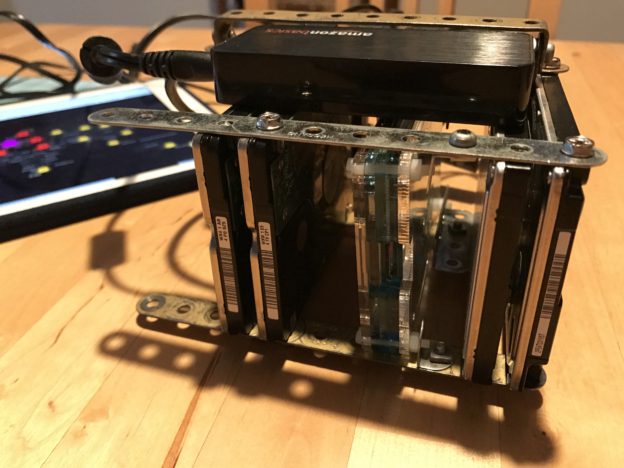
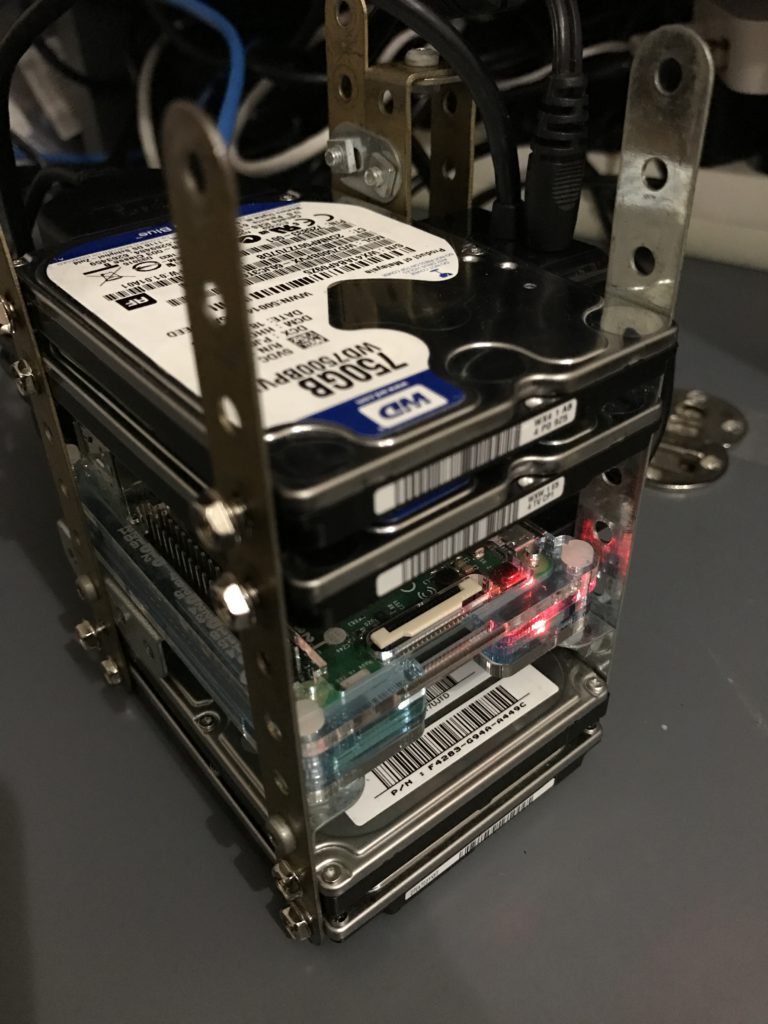
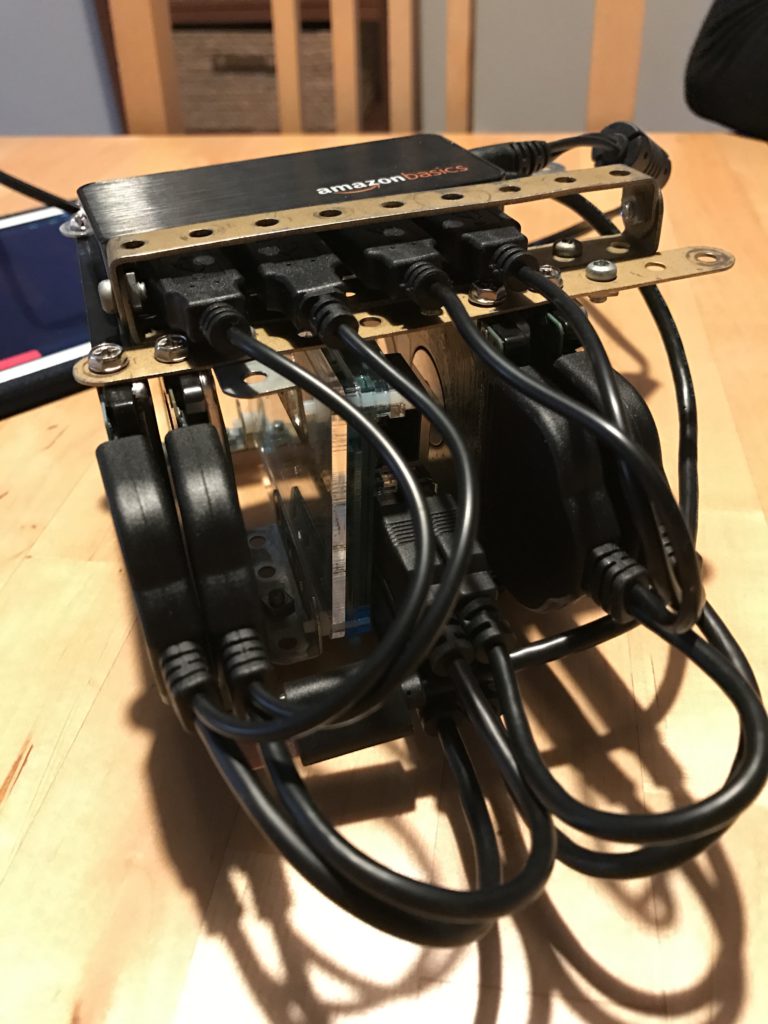
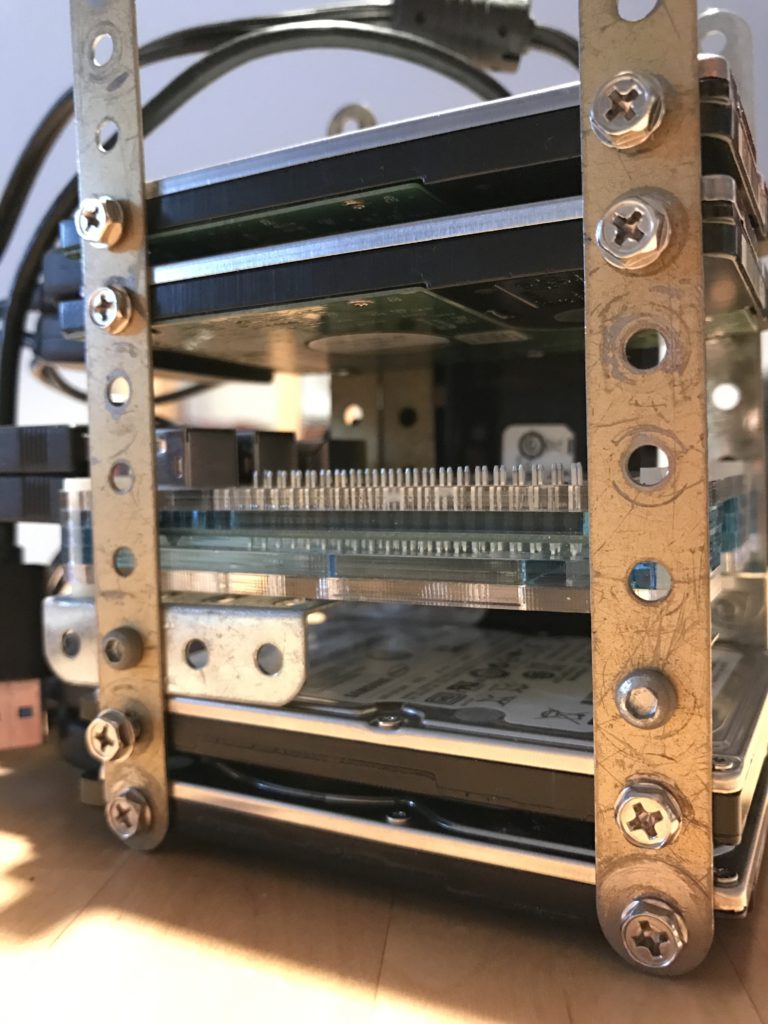
I built my own with the following parts:
- A Raspberry PI > 4, ideally, a RPI 5!
- Four unused 2.5 inch 750 GB internal hard drives
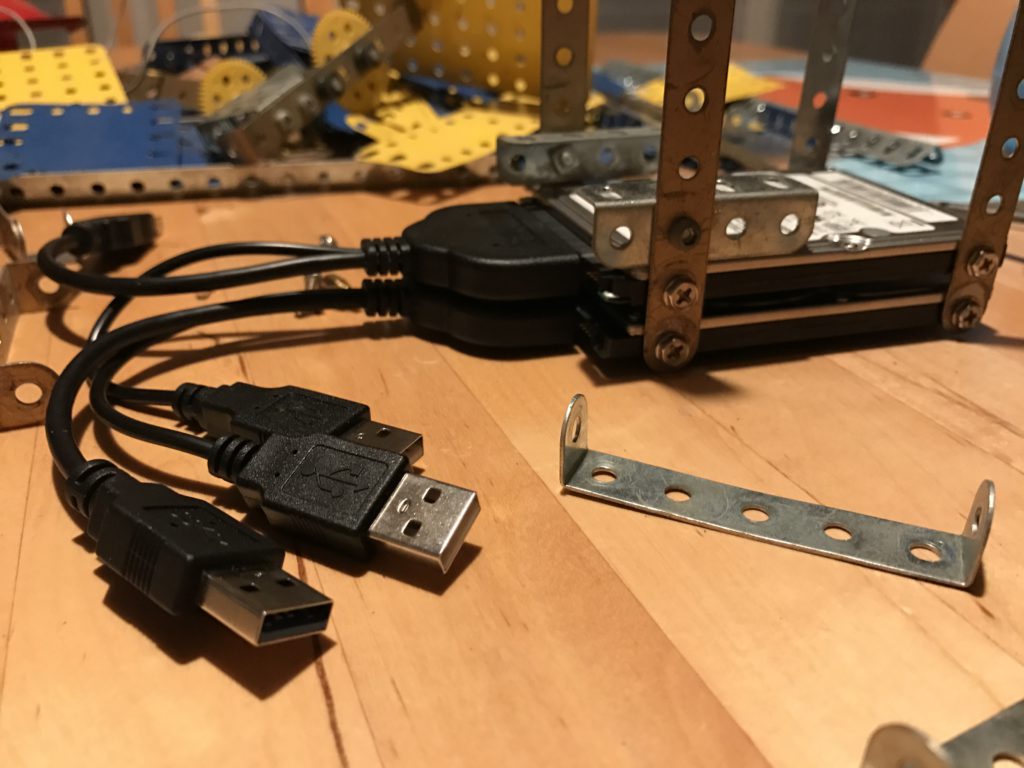
- Four USB to Sata connector bought on Amazon
- An USB power hub
- Meccano parts from my Dad’s childhood!
As you can see on the pictures below, the USB hub powers the four hard drives. I used another power supply connected to the Raspberry PI because all USB ports are currently used. But, I think that, with a larger USB hub, I could have powered the RPI directly from it.
The software part is quite simple to setup. First you need to format your hard drives:
parted -a opt /dev/sda mkpart primary ext4 0% 100% mkfs.ext4 -L storj1 /dev/sda1 parted -a opt /dev/sdb mkpart primary ext4 0% 100% mkfs.ext4 -L storj2 /dev/sdb1I chose to mount the four disks in
/mnt/storjX. Here is what myfstabis looking:#/etc/fstab LABEL=storj1 /mnt/storj1 ext4 defaults 0 1 LABEL=storj2 /mnt/storj2 ext4 defaults 0 1 LABEL=storj3 /mnt/storj3 ext4 defaults 0 1 LABEL=storj4 /mnt/storj4 ext4 defaults 0 1 /mnt/storj1:/mnt/storj2:/mnt/storj3/:/mnt/storj4 /mnt/storjmerge fuse.mergerfs defaults,allow_other,use_ino,fsname=storjmerge 0 0As you can see on the last line of my fstab, I make use of
mergerfsto merge all of my hard drives in a single volume, mounted in/mnt/storjmerge. It’s mostly because Raspberry PI 5 has not enough RAM to run efficiently more than 1 node at once (1GB of RAM seems barely enough while receiving big uploads from peers).To setup mergerfs on your Raspberry PI 5, run the following:
apt install fuse wget https://github.com/trapexit/mergerfs/releases/download/2.20.0/mergerfs_2.20.0.debian-wheezy_armhf.deb dpkg -i mergerfs_2.20.0.debian-wheezy_armhf.deb rm mergerfs_2.20.0.debian-wheezy_armhf.debWhen the hard drives are setup, you need to install storjdaemon:
npm install --global storjshare-daemonThen, create the storj node using the following command:
storjshare create --sjcx=YOURSJCXTOKEN --storage=/mnt/storjmerge/storj.io/ ...Then, make a script to start everything at once:
$ cat start-farming.sh storjshare daemon storjshare start --config /path/to/storjconfig/xxxx.jsonThat’s it!
Going further – Interesting reads about Storj
What is the power consumption?
Bonjour, merci pour ce post ! Peux-tu en dire plus? Est-ce Storj propose deja la possibilité de proposer son propre stockage ?
Please submit a video tutorials..
Great tutorial! I’m really interested in doing this, I have a small doubt, how can I add more drives in the future?
Quel est le hub USB que tu as?
Un hub amazon basics 4 ports alimenté : https://www.amazon.fr/AmazonBasics-Mini-Hub-USB-ports/dp/B00E0NH7DQ/ref=lp_430269031_1_9?s=computers&ie=UTF8&qid=1494960540&sr=1-9&th=1
Nice. So, if I were to use only three disks and power them off the hub, I could use the 4th hub port to feed the RPi?
Yes, it should be enough power 🙂
Hi – I’m trying to replicate this, but I was wondering what OS on the raspberry pi you’re running. I don’t see it being mentioned in this article.
Hi, I’m using Raspbian lite and I tweaked a few parameters as you can see in this article: http://blog.overnetcity.com/2017/05/17/optimize-storj-rpi3-setup/
Dear Sir!
First of all I am going to thank you for very detailed topic. I tried to duplicate it, and I believe there are more people around who will try it in the near future, especially with the recent token sale from Storj.
What I was wonder was, what do we put under YOURSJCXTOKEN at the 6th step?
Thank you very much for all the answers!
Tad
alguiewn habla español para que me ayude a configurar el rig???
And how much it consume? How much do you win/month?
if you have commmentaire on your website at least answer the questions….otherwise close the section.
you idiot!
What is monthly profit with these 4 disks?